When it comes to holiday decorating, window projections are one of the coolest ways to show off your digital decorations. The reason is simple: they’re incredibly easy to set up and, because they’re so eye-catching, they’re always a big hit with neighbors, trick-or-treaters, Christmas carolers, or anyone else who happens to see them. (Updated July 2023)
In a previous article, we provided tips on how to pick the perfect projector for decorating. Today, we’ll take things a step further and show you how you can use your projector to transform any window into a jaw-dropping display for Halloween, Christmas or any other holiday.

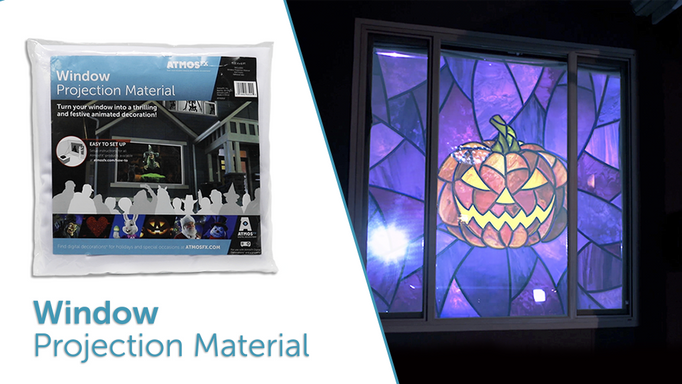
It is easy to transform any window into dynamic Halloween-themed stained glass using Halloween Window Decoration.
Picking the right window
This goes without saying, but the window you choose should be visible from the sidewalk, street, or wherever people pass by. Don’t always assume the largest window is the best – select a window that will have the greatest impact. And, for added effect, choose ones that can be approached by visitors. You’ll be surprised by how many people will want to see your decorations up close!

Project Santa’s Workshop Decoration Collection in your window and neighbors will think St. Nick and his industrious elves have established a toy factory in your living room.
Glass doors (or doors with windows) are also great places to display AtmosFX Decorations – especially if you’re planning to sit on your porch to wait for trick-or-treaters. Many of our decorations look amazing when projected as life-size vertical images. Many AtmosFX Decorations have both vertical and horizontal orientations. And if you’re not sure the decoration you want to display has a vertical mode, you can always try flipping your projector on its side* to make the most out of those taller spaces.

The Terrifier from Creepy Clowns Decoration Collection is a great effect to display in vertical windows.
If you happen to have a house with unusual-shaped windows, don’t let them go to waste! For example, bay windows are especially good for displaying decorations. By stretching a wide sheet of projection material across the full width of your window and attaching it to the window’s inside frame, you’ll be able to create a nice flat screen.

Some decorators like to mix things up by projecting on windows into a house. Here, using Dinosaur Encounter Decoration Collection, a T-Rex appears to be considering a snack.
And remember, when it comes to window projections, there are no rules – if it’s got glass or plastic (or space where glass or plastic could be) and you’ve got the room to point your projector at it, you can project onto it! And we’re not kidding – we’ve even seen people set up short-throw projectors inside of their (completely dry) showers and use our decorations to scare the pants off of party guests. If you can think of a window that would make a great space for a scare, get creative! Or, as you can see in the example above, there is no reason why you can’t choose to project an AtmosFX Decoration into your house!
Picking a projection material
It seems obvious, but to display onto a window, you have to use a piece of material to capture the light you are projecting. After all, if you were to project directly onto clear glass, the light would pass through. The trick is to find something that captures your projection while still allowing enough of the image to pass through on the other side.
Essentially, you want a material that is semi-translucent to act as a screen on your window. This allows you to keep your projector safely inside while everyone on the outside can marvel at the mysterious goings-on inside your home or business.

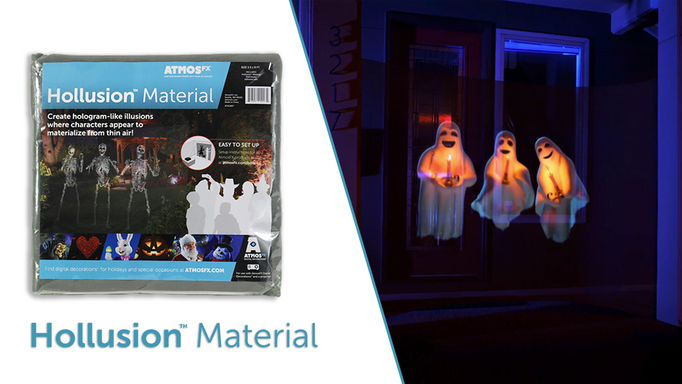
With multiple projectors, you can make it appear that your house has been infested by the playful ghosts of Boo Crew Decoration Collection.
While there are many materials out there that work great for projecting, we offer an AtmosFX-tested-and-approved option that has been designed specifically for digital decorating.
AtmosFX Window Projection Material
If you’re looking for a reusable material that’s easy to set up, easy to remove, and great for windows of all shapes and sizes, AtmosFX Window Projection Material is a great choice for you.

Skeletons from the Bone Chillers 2 Decoration Collection dance over AtmosFX Window Projection Material.
This material is designed to be inexpensive and durable for years of use. Since it’s a semi-translucent sheet of woven fabric, it is light enough that you can use the included peel-and-stick hang tags to put it on your window or window frame, or you can even tape it directly onto your window. Six corner grommets make hanging your material even easier.
There are two sizes: 4’ x 6’ and 5.5’ x 9’. The latter, called Window Projection Material XL, is perfect for large windows. Both are easy to cut for smaller windows, yet durable enough to be folded-up until the next time you want to use it, say, for Christmas or Easter or Independence Day.
See how we used AtmosFX Window Projection Material and Phantasms Decoration Collection to create an amazing window projection display.
Window projection tips
Now that you have your windows picked out and your projection materials ready to go, here are some final tips to help you create the perfect window display.
Pay attention to ambient light
Your projector uses light to display images, so it’s important to pay attention to how much external light will be present when you’re setting up your decorations – especially if your projector has a lower lumen count. While it’s often impossible to make things completely dark, as a rule of thumb, the darker you can make your environment, the better.
If there’s a lot of exterior light shining on or near your window, you’ll want to turn it off. Try replacing your porch light with a darker, Halloween-colored bulb for the night (reds and oranges work great for this purpose), and use a spooky lamp on an outside porch table to give you extra ambient brightness if needed. If you need to keep some lights on inside your house, pull any blinds that are near the window you’re displaying onto. You can also hang a dark sheet or blackout curtains in key locations to block out light that may interfere with your projector. For example, if you’re running your projector in your dining room but need to keep your living room lights on, try hanging a curtain in the door or archway between the two rooms to block the light.
Use Zombie Invasion! Decoration Collection to bring the horde to any window.
Finding the correct angle
When projecting onto windows, you’ll want to pay special attention to the location of your projector. Or, more specifically, your projector’s beam. If you point your projector directly at a window, your viewers may be able to see the bright beam of light coming from the machine. In the world of projecting, this is called “hot spotting,” and it can provide a less-than-desirable effect that can spoil your illusion.
If you run into this issue, take a look at your projected image from the vantage point of your viewers and think about how you can adjust the position of your projector to hide its light beam. Instead of placing your projector on a surface that’s level with your window’s frame, try resting it on a low table and pointing it up toward the window. Or, depending on the setup of your room and furniture, you can also position the projector higher and angle the beam down or place it off to the side and angle it toward your window. Since your image is now being projected onto your surface at an angle, it may look like a distorted trapezoid. However, many projectors have a feature called “keystone correction” that will allow you to change this. By adjusting the keystoning on your projector, you’ll be able to adjust the proportion of your image, allowing it to display properly even when not pointed directly at your surface.

Otherworldly creatures from the Terrors From Beyond Decoration Collection can haunt the windows in your house.
As you can see, using your windows for decorations is one of the easiest ways to transform your home into a memorable, eye-catching experience for any holiday – Halloween, Christmas or anything else. Now, go pick your perfect window and get creative!
Have you used your windows to display AtmosFX Decorations in a cool way? We’d love to see what you did! You can easily send us your photos and videos using the submission form here.
--
* When rotating your projector onto its side, be sure to check that its cooling system can handle operating on its side without damaging it! If all of its vents are on the side, make sure that it’s propped up on a surface that’s secure but still allows airflow.